Tuesday, June 3, 2014

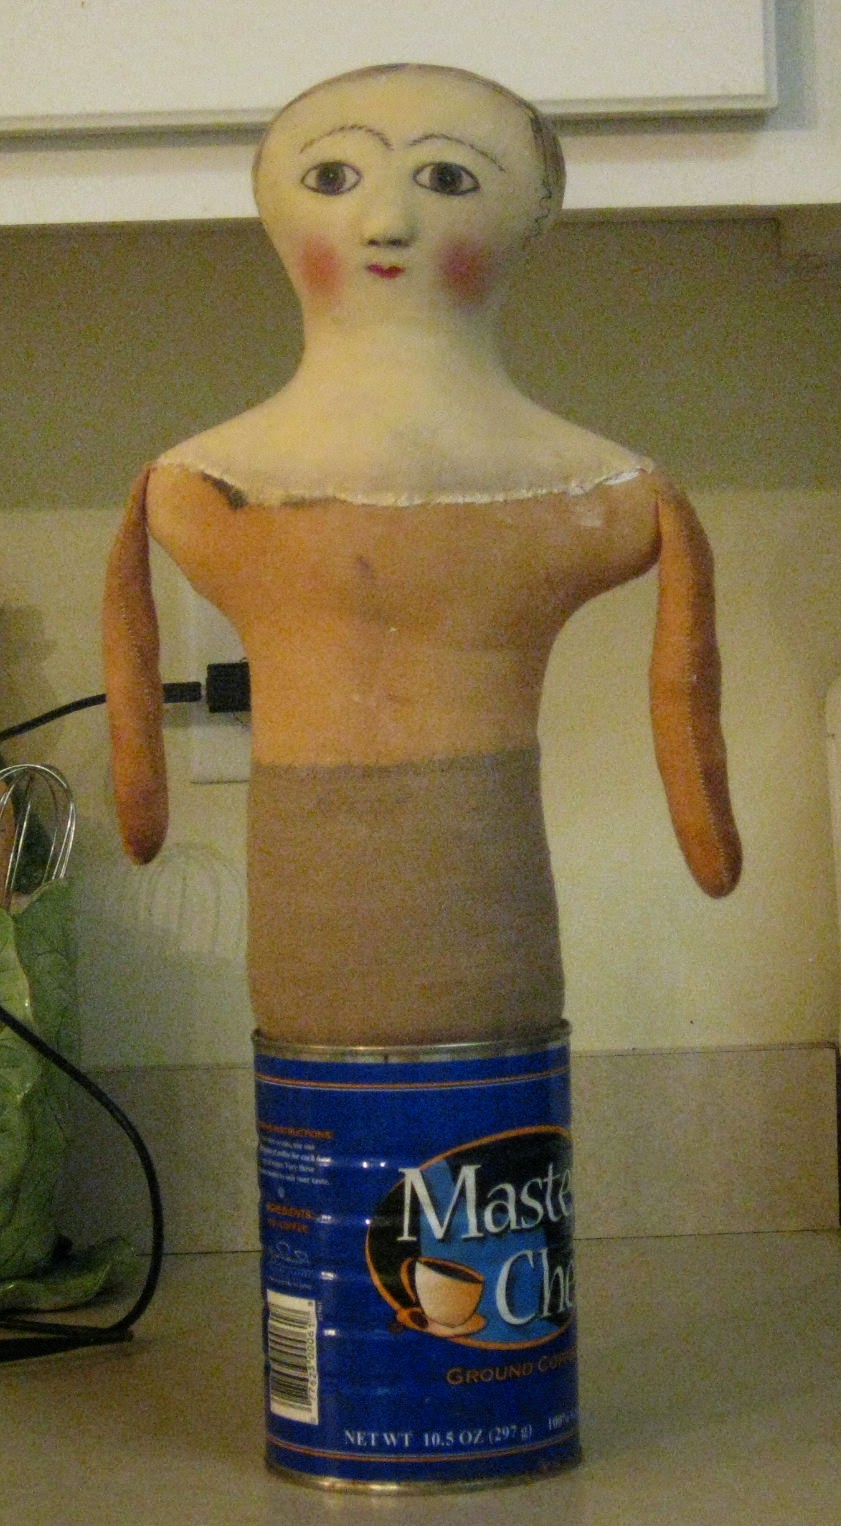
Pin Keeps

Pin Keeps are totally useful and pretty ways to hold your sewing pins and needles. I have seen so many fine ones, and ones with animals and dolls and fruit, and well, there are countless ways to make them. I have made a pin keep doll for my friend Barbara. It is a shame it has taken so long to finish it, but at last, here she is. I like dolls for pin keeps because they are not just still objects, they have personality's and sewing with them in the room is such a pleasure. They serve you well and are pretty to look at. I hope this pin keep dolly will be a trusted and faithful holder for Barbara's sewing things, and that she will enjoy just having her around.

Monday, May 26, 2014

New work in progress

Included in these pictures are several dolls I am working on, trying to finish. They are an old fashioned painted head rag doll for a dear friend of mine, two Alabama babies for two more of my good friends, two Izannah dolls, a pin keep doll in a can, who will have a brown homespun dress for a friend who once apon a time bought a painting from me. Lastly there are several Izannah dolls, I am showing 4 of these here. I love these dolls in this stage, it seems to reveal their character and give you a tiny look at what they will become. We ( my mama, husband and me are also making about 25 tiny 6 inch Izannah dolls. these are to keep my mother busy with things to do and I hope she will enjoy working on them. Over the last two weeks, we have undergone lots of changes, but I hope we will see a brightness in the future, where we can share things with each other and make sweet memories. I appreciate all the very sweet notes I have received. Life has twist and turns that we can never expect or comprehend, but we have to move forward, giving our selves to each other. I will post some more pictures when there is a little more to show. Mama


says I am a slave driver, but I hope she will learn to do more on the dolls and learn to really enjoy the process and be astounded when the doll is finished and she can see what her hands have made.

Friday, May 23, 2014

An Unbelievable Tradgety

  On Mothers Day May 11, 2014 my mothers husband went to the grocery store as usual, and bought a few things, on his way out to the car, he was stopped by a 16 year old boy and asked for his money. Billy refused, and went on to get in the car. the boy ran around to the car door and opened it and shot Billy three times in the chest. We buried Billy last Thursday, he was 87. My mother is 84. This has made us go through huge changes, trying to move back and forth between mama's house and ours. She is unable to stay alone, so our lives have changed in such a way, that my doll making is slowed down for the present. I am training my mother how to help me, partly, because I enjoy her company, and it keeps her busy. I won't be able to respond to comments right away, I will try to do that as I can, but appreciate your understanding of those who are waiting for me to finish special projects for them. I am still making progress every day, and will complete all my dolls that I am making for my friends. I'll post again soon, and appreciate all the good thoughts that I know will be sent our way. Love to you all. martha

Friday, April 25, 2014

Alabama Baby Dolls

Back awhile ago the Maida Dolls Group had a Alabama Baby Doll or ( Ella Smith Indestructible Doll ) challenge. I had wanted to learn to make these dolls for a long time, so this was a golden opportunity to get started. I really like these dolls and admire Ella Smith's creative talent and determination to make a doll like this. I imagine she borrowed from other dolls in certain ways, but there is no other doll out there that looks like a Ella Smith doll. A few years ago, I was able to buy an original antique Ala. baby, she was in sad repair, but all there. I have leaned on her to help me make my copies. I made a face mold of her face, and studied her body, and the way she has been painted. I hope I was able to transfer some of her uniqueness to my dolls. Now, these are my first ones, so don't laugh at the extra big hands or the necks that are a tad to long, or the ears that I didn't get right this first time around, to name just a few of my mistakes, but all in all I like them a lot. Also, I have been trying to make a high collar dress, and this is my first attempt. The collars on these two dresses are not finished, but just tucked in place. I will have to go back and stitch them down and perhaps add a little lace. I wanted the dolls to be dressed plainly, but with real dresses and I think these fit the bill. One dress is floral flower sack that is stained pretty much all over, but gently, and the other dress is made from a very old futon cover that is very light weight cotton and is naturally faded and does have some little holes here and there. After I made these two, I went ahead and made two more, making my improvements and will post them eventually, they will be dressed in these same clothes. Hope you enjoy seeing them.


Monday, April 14, 2014

Five Izannah Dolls finished

Here are five Izannah style dolls finished. the 18 inch dolls still are waiting for their shoes and socks, but they will have them soon. the smaller dolls are as done as I can make them. Making and finishing five dolls like this has been a big undertaking, but I am glad to be finishing up, as we are behind schedule on finishing some bigger Alabama Babies and some Old Fashioned Rag doll dresses. If I had to choose between the  two 18 inch dolls, it would be such a hard choice, also I would have trouble picking one of the small dolls over the others. Each one has her special little personality and pretty outfit. I hope you enjoy seeing them.


Tuesday, March 25, 2014

Bonnet Making

There are so many pretty bonnets to look at. Several people  I know can make the most fabulous bonnets, but my own experience has been to just make the simplest of little hats for my dolls. I decided to try to go a little deeper into hat making and have made these bonnets you see here. They are not much of a departure from my regular little bonnets, but they are some different because I have made them fuller and I also quilted them. Eventually I will make a bonnet with a gathered back, like the prairie bonnets, but for now this will do. If you look close, you will see we didn't get the quilted lines perfectly straight, but I like them anyway. they are substantial without being to heavy, as I used a very light layer of  batting in them. These little models are Pinky in her pink hat and she will have a full skirted double pink dress, and Sissy, who has a reproduction fabric calico blue hat and she will also have the same blue fabric full skirted dress. These dolls will also have  ( Martha shoes ) because they are barefooted. Back last summer I found a bedspread ( I guess that is what it is ) of a floral thin flannel material and this time around all 5 of the dolls I am finishing will have a chemise slip made from this material, instead of white. We are working hard toward finishing all 5 dolls, the tiny 11 1/


2" dolls will be dressed about the same, but with more elaborate tiny bonnets with big ruffles across the bonnet. ( I like to do that ) anyway, here is a little look at something that is new for me.

Monday, March 17, 2014

More Little Biddies - Small Izannah Dolls

More small  dolls underway right now. I am trying to finish 5 dolls, which include two 18" Izannahs and three 11 1/2" Izannah dolls. It takes a long time to make and outfit this many dolls, but I am working pretty hard on the project. The legs are on and body suits ready and the last of the arms was made yesterday, so we are going down the home stretch to having these little people finished. I now have to try to pick fabric for the dresses, which is sort of hard, as I like a lot of the choices, but each will get a dress that I think suits her best. the larger dolls are barefooted and the small ones have booted feet. After these are completed I want to take time to learn how to make a proper shoe. My Martha shoes are cute, but, I need to learn how to make a basic little leather shoe that I can easily change sizes. One of the things about making leather shoes is the sewing and the liner. I tried to hand sew some leather for shoes, but you really need machine stitched seams. When I make any progress on this I will post my findings and show you what I did.

Monday, March 10, 2014

My Old Beauty - How Many Times is enough Times

 Well.  Here we are again one more time. Mona Lisa is ready, after undergoing a new re-make of parts of her and her clothes. After her return from England, I worked on her and made her a new white dress and new legs with painted boots and  put her on e-bay. She did not sell, so I once again started working on her, re-painting part of her eyes, I gave her a new neck line of curls, a new pair of bare feet, shoes and socks, and her white dress was dyed a pink brown. I have asked myself this question and I imagine you doll makers out there have asked yourself this question too, How many times is enough times to work on a doll? On this particular doll,  three times is enough, because I don't think there is anything else I can do to her, or for her. If I felt I still could do better, then I would probably try, but I am satisfied she is beautiful and has a very pretty dress. The dye was a success as this color of pink brown is nice on her. It would be wonderful if we could get everything right from the beginning, but with Mona Lisa it didn't work that way. She made me labor until she was right.  I don't think experience can always save you from having to re work a doll many times, it should, but trying my best, I still made mistakes that I had to correct, that I couldn't see until the end. I am glad I didn't stop trying  to fix my old sweet girl.


Wednesday, March 5, 2014

New alabama Baby Dolls

Here they are. My first attempt at making these Ella Smith Dolls. The first thing I would say about these dolls is they are nothing like the Izannah walker dolls, either in looks, or design. I think I worked on these in a way more than the Izannah's.  They have, in the antique Alabama baby dolls a plaster face mask that is applied to the cloth head, but I deviated from this on these. I did make the plaster face mask, but it was super heavy and thick, because my antique doll I took my mask from is very deep, so I made a cloth face mask for these that has no plaster in it, so they are very light. In the future, I will still use the cloth face mask, but before I smooth the mask to the cloth head, I will pour a little plaster into the mask, as much as I think it needs. Since the dolls do not have a second skin, you have to watch and try not to get paint and stains on the cloth parts of the body, this is harder, as I am  ( super messy ). I could go on quite a while on the mistakes I made on these, but I have that under control on the next batch. Make shorter necks, put in plaster, ears shapes need to be made different.  Ella was very cleaver about the ears. they have no stuffing and have a big ark in the center and are cut so that the ears will curl and get that famous shape they have, of course I messed up on  that the first time around.  All in all, I like the dolls a lot. These are super big and fat, I would say about 22 or 23" tall. soft and squeezy. they should be easy to fit for clothes. I will not cover up their feet, as they are really fat and cute. I also am repairing my antique Alabama baby. She was missing an ear, so I scraped off the remains of the ear and made her a new ear which is glued and stapled to the head and then a small bit of paper clay to cover the staples.  There is not another way to repair this problem, that I can see, also I re glued down some cracked in her face and filled in the cracks with paper clay, her arms and legs will need some attention too. She will never be worth a fortune, and I have tried to do as little as possible to her to get her back to some semblance of what she was when Ella made her. Lastly, the black doll and picture taking, he is dark, it is very hard to see him in the pictures. This is  ( painting the black dolls,  like this one ) a tough problem which will require much experimentation on my part, or a timely  ( happy accident ), which I am hoping for. HaHa  I enjoyed making these dolls. It made me happy to do it and see them sitting on the table after I was done. Hooray


Monday, March 3, 2014

Do I like My Rag Dolls

This post is a little different, as I am asking myself the question, why am I not satisfied with the three rag dolls I made? What is it about them that makes me feel they are not good enough, or not what I or other people would want? When I make a doll, I judge it by  whether or not I like it enough to keep it myself, because if I don't, then there is no question, but that it isn't good enough, or I need to work on it some more to make it into a doll that I would hate to give up. Along the way, there are dolls we make, that no matter what we do, or how hard we try, the dolls never work out as we thought they would. Now, I say this, these dolls are nice. They are well made, and I have labored long and hard on them, time after time, with painting, antiquing, and repainting to try to get them to the old fine painted rag doll look that I do love. Sadly, I am still not satisfied. I would hate to try to sell, or give away any of these dolls as long as I have these feelings about them. When you get into this situation, seeing the work before you and not wanting to keep going, what do you do? I considered removing the body suit and putting on a new stockinet, because I know the root trouble I am having ) These dolls are made of muslin. Muslin is smooth and cannot take a antiquing so you don't have the ability to make it look old. You must have a stockinet with some ribbing to hold stain.  My first mistake was not widening out the head, but even this is not the cause of my dissatisfaction, as pancake  head and spoon head dolls have been around for ages. I can live with this. One of these dolls is for my sister, who is not a particular doll lover, so I am holding back on giving it to her until my problem is solved. I can, but would not expect the dolls clothes to turn the tide in their favor and make me see another side of them. Clothes make a big difference, but I don't think they can carry the day and turn my rag dolls into ( magically being what I wanted them to be. ) What to do? What to do? HaHa What to do is to send these girls to the back of the line, until lightning strikes, and I suddenly become enamored with them, or take the hard road and re- do the heads, but what if I do this and realize I was better off in the first place? Maybe the dolls were alright to begin with? I know you think  I have gone crazy, but this is a realistic problem. Woe is me not to be able to figure this out.


Sunday, February 23, 2014

alabama Baby Dolls

Here are a few pictures of my alabama baby dolls that I am making. I have painted one coat of oil paint on today. They will have to set up for a week or so, and then be sanded and the repaint begins. Since these are my first ones, I'll have to play it by ear on their distressing. I probably will distress them next after they dry,  and then stain and then repaint. I don't know how many times they will need to be worked on. I won't have any trouble with the white doll, as distressing and painting them is much easier, but the black one might pose some problems. Black dolls are hard to adjust, as far as color goes. I will have to go by a photograph, hopefully I can get a bigger one that shows me good details. These dolls are made by making a mold of my antique alabama baby. There are nicer dolls out there with a little better shaped head, so in the future, I might have to free sculpt another one I like better, but for now I will finish these. I did make some bad mistakes in making these, the necks on my dolls are to long, and the bodies are to fat. One of the dolls face is looking up instead of straight ahead, but all these things, I can fix on the next set of dolls. I'm just glad I managed to get this


far with them. I do think they will be pretty dolls, especially when dressed up.

Wednesday, February 19, 2014

the Power of Painting and My alabama baby in Progress.

 I showed on my last Post, a picture of Sissy and Pinky side by side. I have been considering them and today, I have gone back to the paint table to see what could be done to Sissy to soften her up, as she was looking a little  ( meanish ). haha,  Pinky was o:k, but needed a tweek out as well. I will post yesterdays pictures of them and todays so you can see, ( THE POWER OF PAINT ) I put this in real big letters, because painting has power, to change everyday objects into something beautiful. To amaze us when we see something someone has painted that is so beautiful that it stops us in our tracks. Just a touch of paint put in the right place turns something nice into something timeless. This is why I stress that learning to paint is maybe the most important thing you can to do in making your dolls. There is a argument among painters as to what is more important. perspective (  angles - form ) or is it  ( color ). I always thought if something is pretty enough, and  the form is not quite correct, a person would probably love it anyway, but if it correctly drawn, but has no color and is not pretty to look at, then it is wasted. Anyway, here are the comparison pictures, which are changed by simply changing how it is painted. Another thing I wanted to show is the beginnings of my Alabama baby dolls. I am showing only one, but I have made two. This is the doll ready to gesso ( or seal with acrylic paint before the actual oil painting begins ). She is based on my antique doll. I think she can fly with those ears, at least she looks like she can right now, but here again,


 we will see what the power of paint can do to turn this lifeless cloth object into a treasured doll.

Monday, February 17, 2014

Pinky and Sissy Dainty Little dolls

Here are two  about 17 to 18 inch dolls I am making. These smaller daintier dolls will have bare feet that are made separate from the leg and then sewed together. I have made some like this in the past, I think that a one piece leg and foot is stronger, but apparently Izannah made legs this way, so I will too. Paula Walton based her pattern on her antique dolls, so I am following her patterns this time around. They will also have the daintier hands with a slightly different finger pattern, that gives them longer fingers. These smaller dolls are fun to do and a delightful size standing on a table or sitting down. You see a big difference in these two dolls. Pinky has had a mold made of her, so that she can be reproduced, but Sissy has not, and will not be reproduced again. Pinky has a older look, where as Sissy is not a new doll, but does not have the wear and tear and as much age, she is more pristine and fresh. It is hard to choose sometimes, between the older or newer looking dolls, but the ageing and painting process is similar, but different. the newer looking doll has had more base coats of oil paint before a mild distressing, but little Pinky has had little base painting, before distressing and then heavier paint added on in key places on her face and shoulders. Both dolls will be dressed in aged cotton fabric, no bonnets this time, and hopefully , some shoes and socks. these feet are really tiny, so I will have my work cut out for me. In the past I never made shoes for the barefoot dolls, and especially in this size, but it would be nice to have them. I will put Sissy's pictures up here first, then Pinky's.  I wanted to add that later on this year, I am going to try to get a video camera, and hopefully be able to demonstrate some of these painting techniques.  I can tell you how I painted these dolls, but showing you would be a better learning tool and much easier to understand and follow. I don't get to travel and go places much any more, so I will try to demonstrate a few things I learned for any one who is interested. I have learned a lot from other people's tutorials, so I will try to share as well.